- all cables and wires must be stuck down to prevent hazards of people tripping in the studio.
- make sure all legs on the light stand and tripods are level so the stand do not topple over.
- be very careful when placing the light on the stand as the light can be heavy and make sure the stands are at a height that easy for you to place the light on the stand.
- Be careful when taking the cover off the light as you don't want to get grease marks on the lighting.
- be extra careful when switching lights as the bulbs are very fragile
- make sure you are in bright light when setting up the studio as you want to be able to see what your are doing.
- the covers must be removed before switching on the lights.
Rembrandt Lighting


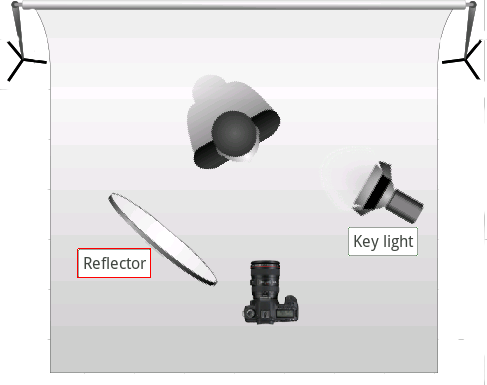
Rembrandt lighting is mainly used for portraits as it creates very atmospheric effects and creates dimension by sculpting the face with light. This is used by using one key light and sometimes a reflector this is used to make highlight lighter for a more dramatic effect. I think Rembrandt can make very flattering images as they are soft and have an element of beauty to them. It causes drama but also in a calming way as the shadows are dark but the images are soft. I really like this lightening technique as it really focuses on shadows and highlights and there are so many different tonal ranges and details in the images.
Dark Field lighting


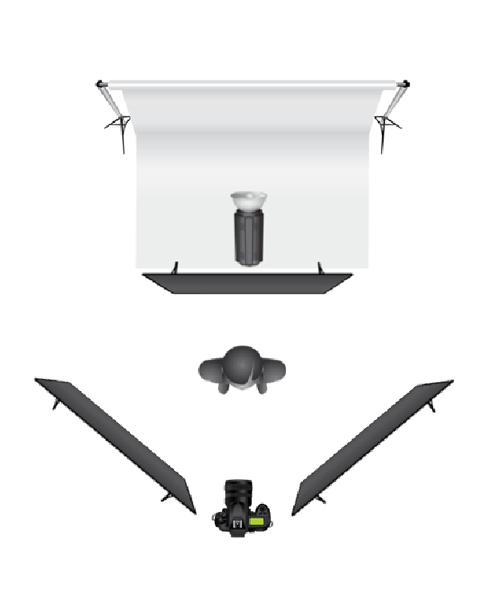
This is used often for product photography this is done by placing 3 black boards in a triangle and one light behind the back bored with a flash attached to it.Then you would make the room dark. I really like this technique as it very atmospheric and kind of creepy. I like the fact you can only see the outline but you can still the dimension and colour of the product, This is very good for product photography as it creates a very unusual effect that is striking the eye,
Clam shell lighting

This kind of lighting is good for portraits especially to do with beauty as the light is flat and even. This technique is achieved by having two soft boxes or diffused light ether each side of your model or above and below them. I like this technique as the images are very flattering they also make the images look very natural.This would be very good for portraits where you want to focus on natural beauty.
Flash Metering
This is done by using a light meter. you first need to place your model infront of the lights and take a reading from the side of there face around the cheek bone area you then set the flash. The light meter will then tell you 3 readings you need this will be the iso the f stop and the shutter speed you will then need to put your camera on manual and put these readings into you camera this should make your images perfectly exposed.
No comments:
Post a Comment